Introduction
Timeline is made up of multiple audio and video tracks onto which media can be inserted. A media can be added by dragging items from the project panel or source monitor and placing them in the desired order on timeline panel. Timeline and the Program Monitor are integrally linked. Below figure shows Timeline panel.

Sequence is a representation of content within the Timeline, it get added in Project Panel when media brought on the timeline. To open a sequence, double-click on the sequence in the Project panel, and it opens in the Timeline.
Disable Clip
Disabled clips do not appear in the Program Monitor or in a preview or video file that you export. To disable Clip
- Select one or more clips in a Timeline panel
- Go to Clip > Enable. Check mark next to the ‘Enable’ indicates that the selected clips is enabled.
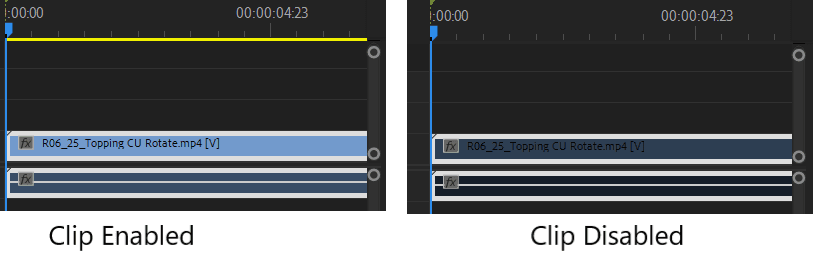
- Click on ‘Enable’ to disable the Clip. Disabled clips appear dimmed in a Timeline panel.
Below figure shows enabled and disabled clip.
 To enable the clip, go to Clip > Enable and toggle it.
Changing Track Height
By default, the tracks are small and devoid of any indication of the content they contain. To change the appearance of audio and video tracks
- Click on the wrench icon i.e. Timeline Display Settings present at left upper in Timeline panel.
- To minimize the tracks, select Minimize All Tracks.
- To maximize the tracks, select Expand All Tracks.
Alternatively on the right edge of the Timeline, grab one of the edges of the vertical zoom bar for either the audio or video tracks, and drag inward to expand track size, outward to minimize track size. To adjust the height of individual tracks
- Hover track header area of the Timeline, position the pointer at the top of the track that you want to adjust.
- Drag upward to expand the track and downward to minimize the track, when height adjustment pointer appears.
Below figure shows various expanded video track.

Snap Clip
It controls whether items in the Timeline snap to each other when moved. It is enabled by default, clip moved on timeline, automatically aligns with, or snaps to, the edge of another clip. To toggle the snap setting, clip on ‘Snap’ as shown in Timeline panel introduction, or press S on the keyboard. To snap a clip
- Enable snap feature using a keyboard shortcut (S)
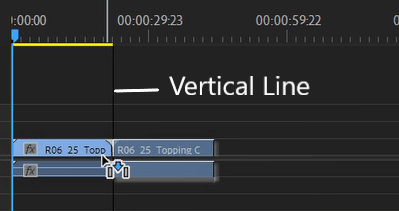
- Drag the edge of a clip close to the edge of another clip. A vertical line appears when alignment occurs.
Below figure shows the snap behaviour when one clip is dragged close to the edge of other clip on the Timeline.