This article discuss about working with Brushes in Adobe Photoshop. We will go through various brush related configuration in Brush Settings panel and contextual configuration in Option Panel.
Working with Brush Settings Panel
Tap the B key to select the Brush tool. To change the brush attributes,
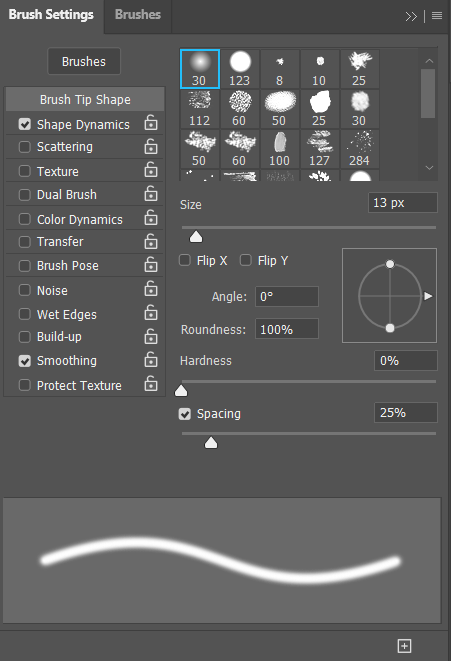
- Go go Windows menu and choose Brush Settings. Using this panel, we can change the size and hardness of the brush. I can also change the shape and angle of the brush.
- We can use the Right Bracket (]) key to get a larger brush or the Left Bracket key([) to get a smaller brush.
- We can also access that Brush Preset Picker, by just right-clicking, and then selecting whatever attributes I want. Tapping Enter in order to hide it.
- To get smooth stroke, decrease the spacing from Brush Settings panel.
- If I decrease the hardness down to zero in the Brush Settings panel, the paint will feather beyond the icon for the brush. If hardness is set to maximum, the brush stays within the brush icon.
- When the brush cursor ever looks like these cross hairs here, it means that the Cap Locks key is on.
Brush Options in Option Bar
Now let’s take a look at a few of the other brush options in the Options bar.
- We can change the Opacity by using the scrubby slider, or we can enter in a value. Also we can use the disclosure triangle to access the slider.
- When I decrease the Flow, paint, it will take a while for that paint to build up. If instead I set the flow back up to its default of 100, as soon as I click, we’re going to get 100% of the flow. It’s kind of like how hard you would press down a nozzle on a can of spray paint.
- Increase the Smoothing amount to get smoother painting stroke again.
- If you ever want to connect two dots, you can click once, and then hold down the Shift key, and then click again. Photoshop will connect those two dots with a line.
- Blend Modes change the way that the color in the brush will blend with the colors on the layers below it. To change the mode, click on disclosure triangle right to the Mode. Blend Mode Screen and Multiply are opposite to each other.
