Introduction
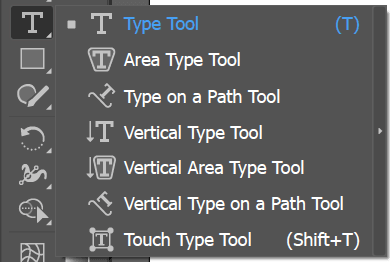
Type tool are used to add text into Artboard. Various type of tools for adding text are shown in below figure.
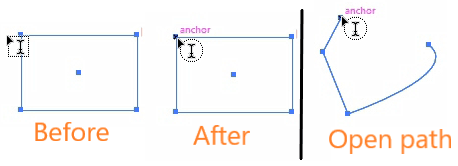
Click within any existing type object to enter or edit text. To exit type editing mode, press Esc key. To resize textbox, hold down the Ctrl (Command) key (temporarily turning cursor into a Selection tool), and drag the anchor points. To change the color of the letters change the Fill color. To move a text box, with Selection Tool selected, click on the textbox and drag it to its new location. To resize a text box, drag the “handles” with the Selection Tool, hold down the Shift key to keep it proportionate. By default, Scale tool scales both the text frame and its contents. To scale the text frame alone, Direct-Select it first. Then use the Scale tool, or scale it manually using the bounding box.
Type Tool
Point type is a horizontal or vertical line of text that begins where you click and expands as you enter characters. Each line of text is independent i.e the line expands or shrinks as you edit it, but doesn’t wrap to the next line. To add another line of text press Enter (Return) key.To scale Point type, use the Selection tool to select the type and drag on one of the handles of the bounding box. To add text
- Select type tool by pressing T
- Click on the Artboard to begin a Point Text object
- Type the text in textbox
Area Type Tool
Area type (also called paragraph type) uses the boundaries of an object to control the flow of characters, either horizontally or vertically. It automatically wraps to the next line. Use the Return (Enter) key to start a new paragraph within an Area type object. To create text
- Select the Type tool or the Vertical Type tool
- Click on the Artboard, and drag diagonally to define a rectangular bounding area.
- Text box with default text will be created. To identify area type tool box, look for box as shown in below figure.
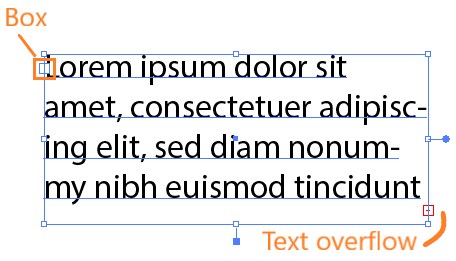 If you enter more text than can fit within an area, a small box containing a plus symbol (+) appears near the bottom of the bounding area as shown in above figure.
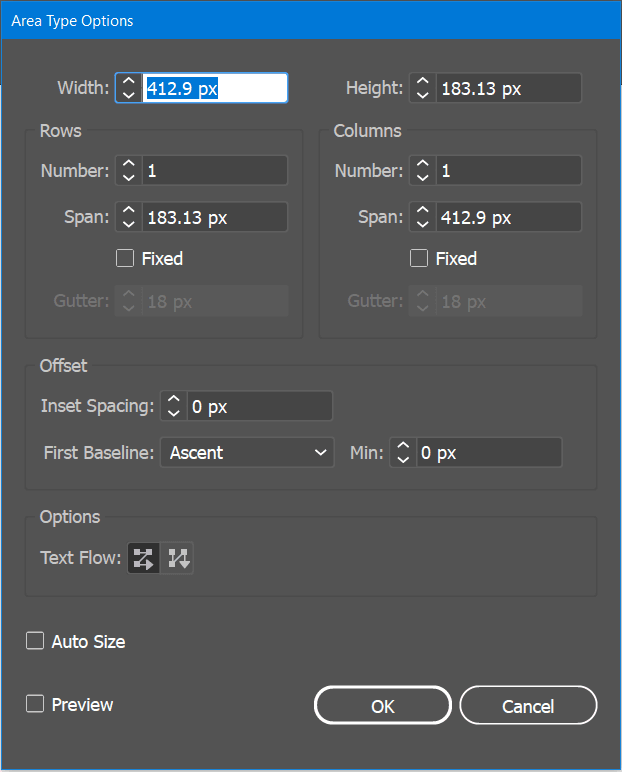
To configure Area type tool, go to Type > Area Type Options. Below figure shows area type configuration
To create a custom container for Area type, constructing a closed path with any tool. With a closed path, choose Type Tool and click on the path (not inside the object) to place text within the confines of the path. Hold down the Option (Alt) key to create Area type with an open path when the Area Type tool is not selected. Below figure shows the cursor when type tool is on the path of the container.
Path Type Tool
Type on a path flows along the edge of an open or a closed path. Text flows in the direction in which points were added to the path. It can be used for both open and closed paths. To add text on path
- Select the Type On A Path tool as shown in above tools panel figure.
- Set tool formatting options in Type > Type on a Path
- Position the pointer on the path, and click. Path become unstroked and unfilled, and is ready to receive text.
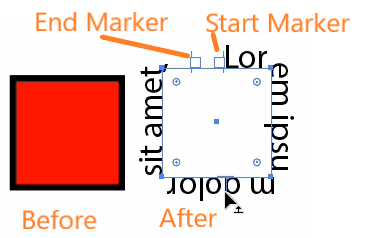
Use the Direct Selection tool to reshape the path, and reflow type along a path. With Path type on a circle, text will be forced to the bottom of the circle in case of Align Center. Because Path type object has two handles i.e. Start marker and End marker between which the type is centered. By default these two handles appear together, on a closed path. Below figure shows default text created using this tool.