Smart objects offer a non-destructive and flexible way to work with layers in Photoshop, especially when you’re resizing and transforming or warping layers. In this article I will discuss about working with Smart Object in Photoshop.
Let’s say for instance that I want to make a image smaller within the canvas.
- I’m going to convert the background into a layer by clicking on the lock icon
- Then I’ll go to Edit menu and choose Free Transform.
- I’ll hold on the option key on the Mac or the alt key on Windows and transform this from the center in order to make it smaller.
- Once I apply the transformation, Photoshop has actually thrown away the information that it no longer needed.
Now if I changed my mind and want the original image
- I will go to Edit menu and I choose Free Transform.
- Hold down the option key and resize this larger.
- Photoshop has already thrown away a bunch of information when we resized the image to a smaller size. Now it’s going to have to make up information when I apply the transformation.
- So we can see that I’ve lost a lot of image quality, i.e. modified image in below figure.

Creating Smart Object
All right, so let’s use the file menu and revert this. To avoid that loss of quality, we’re going to use a smart object.
- To convert above layer into a smart object, go to Layer menu and then Smart Objects, and then choose Convert to Smart Object.
- We can see on the layers panel we no longer have a background, below image shows the smart object icon.
- Now, if I use Control + T to access Free Transform, and I hold down ALT key, we can go ahead and resize this and make this as small as we want.
- Then at any time, I can use command + T again and then transform this and make it larger without loosing the image quality.
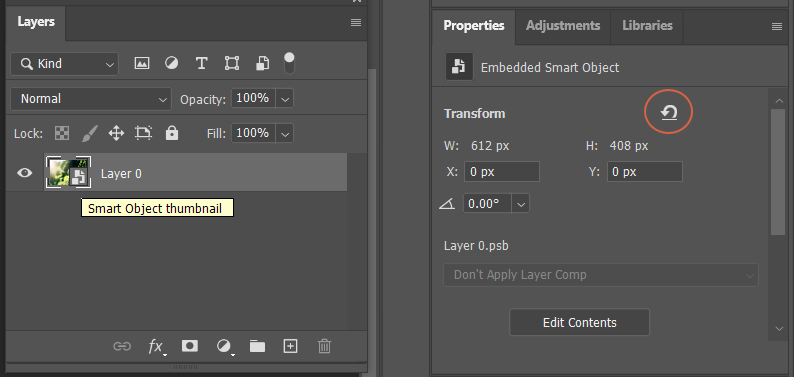
- We can easily remove a transformation, by click on the reset icon in the Properties panel.
Editing Smart Object
If you want to do pixel based editing of smart objects, then you’ll need to edit the contents of the smart object in order to access the pixels.
- If I select the healing brush, you’ll see that I can’t heal out because the layer is a smart object
- Go to Layer menu, choose Smart Objects and then select Edit Contents.
- Photoshop will open the contents of the smart object in new window. Now I’ll use the healing brush, in order to fine tune the object.
- As soon as I select the File menu and choose Save. Photoshop will update the contents of the smart object in the parent document.

Smart objects will most likely make your files larger because they’re storing extra information. And you can convert your smart objects into a regular layer by choosing the Layer menu and then Smart Objects, and then Convert to Layers.
Replacing the Content
- We’re going to start with one layer (layer 0) document.
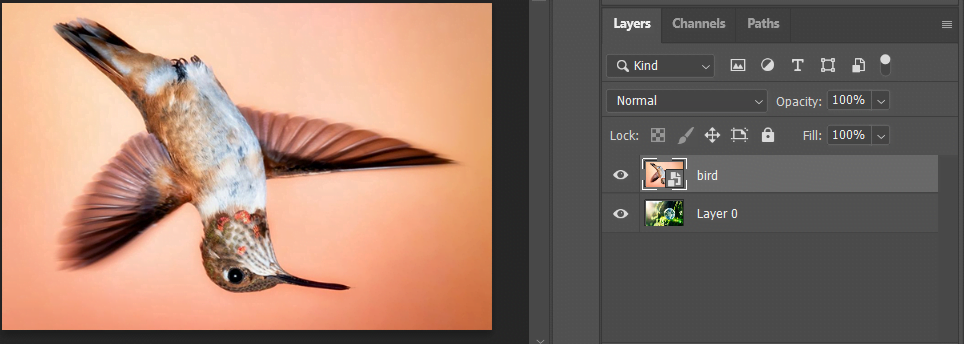
- Then we’re going to place another file by using the File menu and choosing Place Embedded. We’ll navigate to the bird image and select.
- Photoshop places the file as smart object and it resizes it to fit in the open document.
- Now I need to change the stacking order, so I’m going to convert the background into a layer by clicking on the lock icon. Then I’ll change the blend mode to overlay and I’ll decrease the opacity of the cloud layer to 50%.
- Then I’ll select the bird layer. I’ll go to Edit menu and select Transform, and then choose Flip Horizontal. We’ve done some work on the smart object.
- But at this point I need to replace it with a different image. So from the Layer menu, I’ll choose Smart Objects and then Replace Contents.
- I’ll navigate to the desired file and select. But once I place it, Photoshop will apply all the edit we have done on earlier smart object. So we didn’t have to redo any of our work.
- You can see how replacing the contents of a smart object can save us a lot of time.

