Introduction
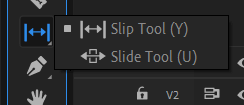
Slip and slide edits are useful for adjusting cuts in a sequence. They preserve the overall length of timeline. These tools are located on Tools panel. Keyboard shortcut for Slip Tool is Y key and Slide Tool is U key.

Slip Edit
Slip edit changes the selected clip’s In and Out points forward or backward. It affects only one clip. Slipping a clip right or left , changes the In and Out points of the selected clip while retaining that clip’s length and not changing the two adjacent clips. The Slip tool moves a clip under two adjacent clips.
To slip edit on Timeline
- Select the Slip Tool from the Tools panel.
- Position it over the clip you want to edit. When Slip Tool icon appears, click on the clip and drag.
- Use Program Monitor split screen to find a better matching edit. Upper left and upper right frames are reference frame and won’t change during this edit. Frame on the bottom left is the first frame that is being slipped. Frame on the bottom right the last frame that is being slipped.
Below figure shows an example of slip edit. Program monitor shows the frame at playhead in Timeline panel. Tree.mp4 clip and Butterfly clip are adjacent to Jelly clip.

After slip edit on clip Jelly, frame at the playhead changes to bottom left frame of the Program Monitor as shown in the below image. Frame on upper left of program monitor shows the last frame of the Butterfly clip. Similarly frame on upper right shows the first frame of the clip Tree.mp4.

Slide Edit
Slide edit shifts a clip in time while trimming adjacent clips to compensate for the move. When a clip is dragged left or right with the Slide tool, the Out point of the preceding clip and the In point of the following clip are trimmed. Selected clip In and Out points (and hence, its duration) remain unchanged.
To slide edit on Timeline
- Select the Slide Tool.
- Position it over the clip you want to edit. When Slide Tool icon appears, click on the clip and drag.
- Use Program Monitor split screen to find a better matching edit. The two top images are the In point and Out point of selected clip. They do not change. The two larger images are the Out point and In point of the adjacent clips. Out point corresponds to the clip on the left of the selected clip. Similarly In point corresponds to the clip on the right side of the selected clip.These edit points change as you slide the selected clip over those adjacent clips.
- In and Out points for the adjacent clips are updated after mouse release. Program Monitor displays the result while maintaining the clip and sequence duration.
Below shows an example of Slide Edit. Clip Butterfly Flying is drag left after selecting Slide Edit Tool. Start point of the clip on the timeline changed from 3:23 to 1:02 by dragging left using Slide Edit Tool. Because of shift in the selected clip position, adjacent clip In and Out point are changed as shown in the below figure.

