Introduction
Multicamera editing feature is helpful for editing footage captured with multiple cameras. Several cameras my be used for shooting different shots of the action from different angles. To view all camera angles at the same time and switch between them, Multi Camera Source Sequence is flexible way to work in Premiere Pro.
Create Multicamera Sequence
To create multi-camera sequences:
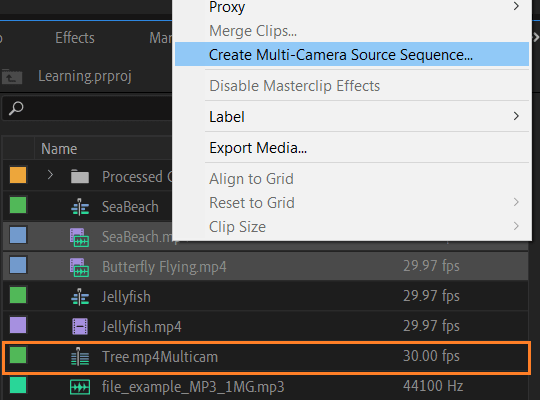
- Select clips recorded from multiple camera in Project Panel.
- Right-click one of them and select Create Multi-Camera Source Sequence from context menu.
- Select the synchronization point in the dialog box and click OK.
- A new multicam sequence is added in the Project Panel.
Open Multicamera Sequence
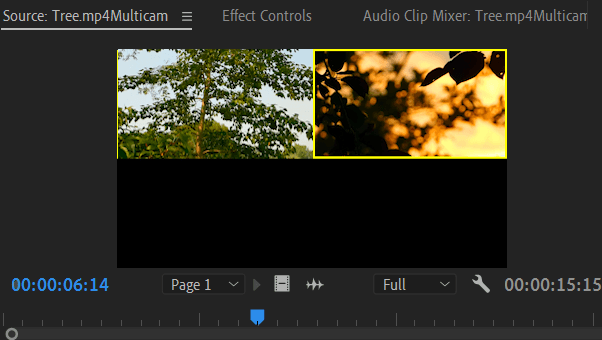
Double click a multi-camera source sequence to opens in on the Source Monitor. To add it on Timeline
- Select a multi-camera source sequence in Project Panel
- Right click on the clip and select Open in Timeline, to open on Timeline.
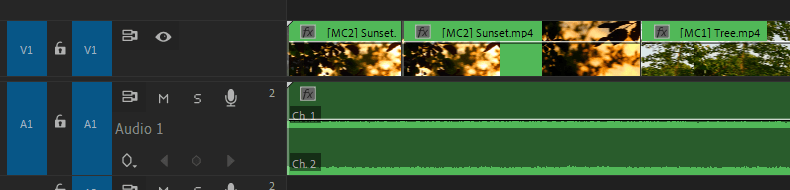
- All the original clips overlaid on separate tracks.
Syncing Clips from Different Cameras
To synchronize clips captured at different angle using multiple cameras angle set a common synchronization point for each of them. This is a point at which all the camera clips are at exactly the same moment in time, so they will be in sync with each other. Option for synchronization point are
- In Points or Out Points : Open each of camera clips and find a good place to synchronize them. Add In or Out points to this point in each clip.
- Timecode : Multiple camera clips are synchronized using timecode that are embedded in the footage.
- Audio : Synchronize video clips by looking for a common spike in the audio waveform.

Audio Settings
Below are the options for setting audio
- Camera 1: It will sync all video clips with the audio track from camera 1 only. Audio tracks from other camera angles are muted. This means that the audio from camera 1 will be dominant and constant throughout your multi-camera source sequence. First selected clip is Camera 1.
- All Cameras: It will mix all the audio tracks from the video clips together.
- Switch Audio: Each camera angle will use its own source audio. For example, when you select Camera Angle 2, the audio from Camera Angle 2 will be heard, and if you switch back to Camera Angle 1, the audio from Camera Angle 1 will be heard
Editing Sequence
To edit the multi-camera sequence:
- Select multi-camera source sequence in the Project Panel.
- Right click and select New Sequence From Clip to create a new sequence
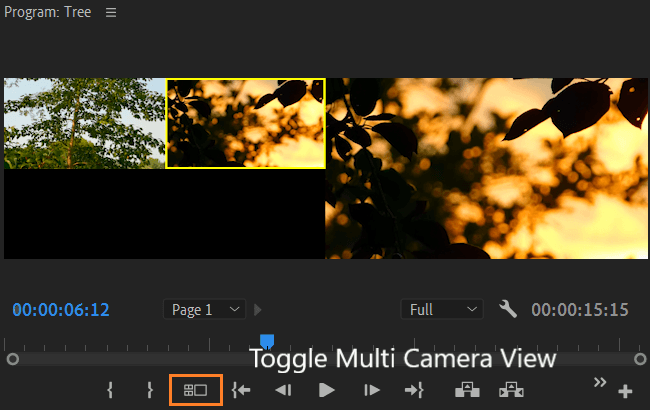
- Click on any active video track header to target it, and then choose Clip > Multi-Camera > Enable. This changes the normal program view to multi-camera view and shows all the camera angles contained in the multi-camera source sequence.
- Left half on Program monitor shows the individual camera clips while the right half shows the output.
- To switch between cameras, play the sequence and click the desired camera angle. Selected camera angle has yellow border in the output view. Switch back and forth between the angles until you achieve your desired sequence.
Set Camera Angles
To select the angles to view in multi camera clip:
- Open multi camera source sequence on Source Monitor
- Click on the wrench icon on Source Monitor to open pop-up menu.
- Select Edit Cameras in pop-up menu.
- Edit Cameras dialog box list all the clips in the original order that they were arranged in the sequence tracks.
- Drag-and-drop the clips to change the sequence order.
- Set the number of camera sources per page and navigate between pages as needed.

Refining Multi-Camera Sequence
Zoom in to sequence to see the cuts between the clip. Each cut has a label indicating the camera angle. To swap the angle used for a particular edit, select the clip, and click on a different camera angle. If you want to keep the camera angles same, but adjust the edit point
- Hit N key to switch the Rolling Edit Tool.
- Grab the edit point you wish to change and drag along the sequence to reposition the cut.
To switch in between camera angles, hit keyboard’s number keys i.e. 1 for Camera Angle 1, 2 for Camera Angle 2, and son on. Premiere Pro automatically cut and replaced the new angle for each timecode you selected.