Introduction
A image can be cropped using vector mask, or crop image tool. These can be found in Properties Panel (Window > Properties) as shown in below figure. Both of these panels are context sensitive, so select the image with Selection Tool for these option to visible.

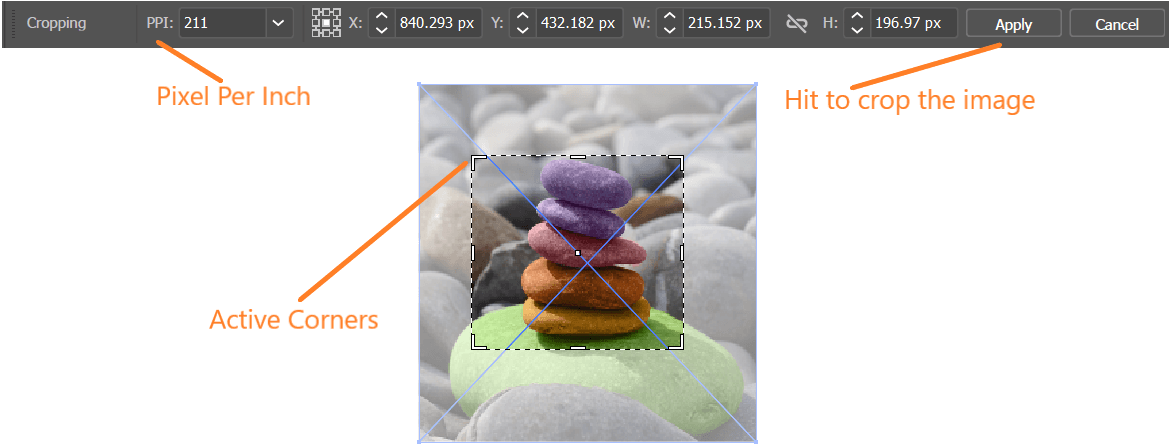
Crop Image Tool
To crop image using Crop Image tool as shown in above figure, select the image and then click on the tool button. Active corners on the image will appear after clicking, drag around to define how the image will be cropped. To specify the resolution for the cropped image change PPI in Control bar, maximum resolution cannot be greater the original image resolution.
Mask Tool
With the image selected, click on the Mask button in the Control or Properties panel. Drag any of the mid-edge or corner handles that are placed around the image to change the size of the vector mask. In the below image, handles are modified after selecting the anchor points using Direction selection.

You can also later edit vector mask by targeting the automatically created <Clipping Path> associated with the image in the <Clip Group> found in the Layers Panel.
Generating Own Mask
To crop an image by generating own mask
- Open the image you want to crop.
- Using the Pen tool (P) draw out a shape in which you want to crop the image, over the image. Set fill color to none so that the actual image is visible while drawing the shape.
- With both the object selected (image and the shape) go to Object > Clipping Mask > Make
Below figure shows the cropped image generated using mask drawn using Pen Tool.
