Introduction
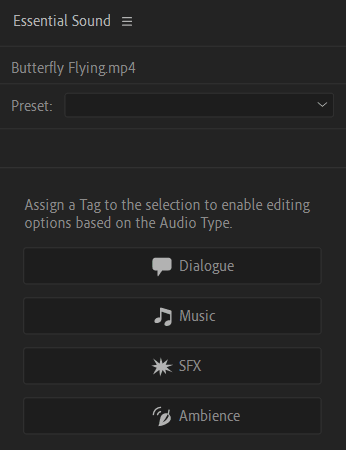
Essential Sound panel gives an extensive tool set for audio mixing techniques and repair options. It allows to classify audio clips as Dialogue, Music, SFX, or Ambience. To open the panel, go to Window > Essential Sound.
Classify Audio Clip
To begin editing, first classify audio clips. To classify audio clip
- Add audio track in the Timeline.
- Select audio clips in timeline, and open Essential Sound Panel.
- Choose audio type. Edit using presets, loudness controls, repair, clarity, creative, and volume controls.
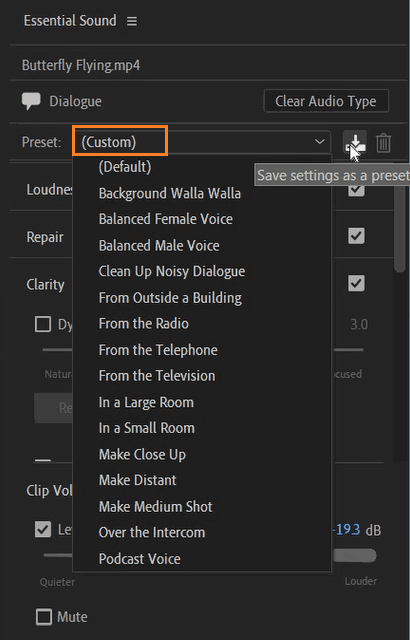
Choice of audio preset depend on story, platform, and genre. Any adjustments made on preset, will change the name of preset to Custom as shown in below image. To save custom preset, click on Save setting as a Preset button. Saved preset will in preset dropdown.
Important Settings
Below is the list of few common settings present in Essential Sound panel
- Repair : Reduce Noise option applies an Adaptive Noise Reduction to audio. Reduce Rumble option will remove microphone rumble. DeHum option removes the sound of electrical hums from audio. DeEss removes the harsh sounds.
- Clarity : Improve the clarity of audio using Dynamics, EQ and Enhance Speech. Dynamics option compress or expand the dynamic range of dialogue recording. EQ option will apply a Graphic Equalizer to the clip. Enhance Speech applies a Vocal Enhancer effect to audio track.
- Creative : It adds atmospherics to dialogue to make it sound like it was recorded in a particular environment.
- Volume : Increase or reduce the overall volume without distorting the audio.
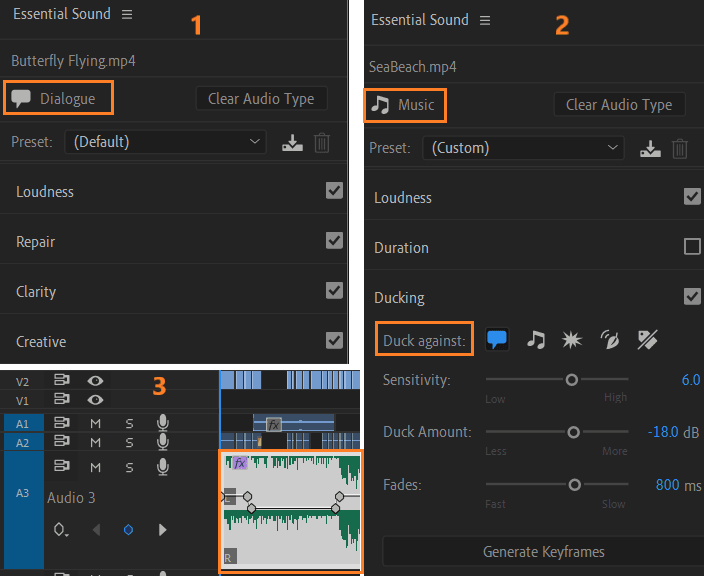
Auto Ducking
Auto Ducking allows for automatic computation of keyframes that lower the volume of a background sound against a foreground sound. To mix audio clips automatically
- Add different audio clips on multiple track in the Timeline.
- Select audio clips in timeline, and assign audio type by open Essential Sound Panel.
- Select another audio clips (for example, background music), and assign it with audio type other than above.
- Click the checkbox next to Ducking to enable auto-ducking and set auto-ducking options.
- Click on Generate Keyframes to compute and set keyframes. Keyframe are added on the selected audio clips adjusting audio gain.
In the below image an audio track of clip Butterfly Flying.mp4 is tagged as Dialogue as shown in top leftmost image. Another audio track SeaBeach.mp4 is marked as Music in the Essential Sound panel as shown in top rightmost image. To duck this audio track against the first clip, enable Duck against by clicking on the check box and select Dialogue. Click on Generate Keyframes button present at the bottom of top rightmost image. This option will add new keyframe adjusting audio gain as shown in the left bottom image.
Reference
Editing, repairing, and improving audio using Essential Sound panel